Tubeless Ready????

Mtl_Biker

Active Member
I know absolutely nothing about tubeless wheels/tires on bicycles, but I'm seeing a lot of e-bikes that claim to be "tubeless ready". What exactly does that mean? Does it mean the tires have tubes in them but the tubes could be removed? Or that a whole new tire (tubeless) could be put onto that rim?

My experience with tube and tubeless tires is on motorcycles... I've had motorcycles with tubeless tires and have gotten punctures that were easy to repair (plug) on the road without even having to remove the wheel from the bike. And the plugs then lasted the rest of the life of the tire. And I've also had (and have now) a BMW GS with TUBE tires, where fixing a flat is a monstrous big job, especially when you're on a tour (and at night in the rain when you're alone). So on a motorcycle I'd much rather have tubeless tires.

But how does this work on bicycles? How do you fix a flat? Or do you carry a whole spare tire? And then with tubeless you've have to have a really high air pressure to seat the bead of the new tire... can bicycle pumps give high enough pressure for that?

So, what are the pros and cons of tubeless tires on bicycles?

Thanks for your comments.
 
I have a tubeless MTB. I carry sealant, plug kit and a spare tube on rides where I would not want to walk or there is no cell phone service.
 
Tubeless Repair Kit …
dynaplug_a.jpg

  • Dynaplug Mega Pill (US$77)
  • Topeak AirBooster (~ US$25)
  • 25 g CO2 cartridges (~ US$2 each)
  • valve bits & pieces – core, cap, removal tool, spare tubeless valve
  • disposable blue wipes
The photo on the right shows Finish Line Tubeless Sealant (blue goo) seeping out of a hole. The brass cap and the stainless steel tube of the Dynaplug will be pushed straight through the hole and then pulled out (leaving the viscoelastic rubber-impgregnated plug in the tyre).

In the centre of the left photo you can see a spare plug (US$10 for a pack of 5) – this is what remains in the tyre (including the brass point).
 
Last edited by a moderator:
Tubeless Repair Kit …

The photo on the right shows Finish Line Tubeless Sealant (blue goo) seeping out of a hole. The brass cap and the stainless steel tube of the Dynaplug will be pushed straight through the hole and then pulled out (leaving the viscoelastic rubber-impgregnated plug in the tyre).

In the centre of the left photo you can see a spare plug (US$10 for a pack of 5) – this is what remains in the tyre (including the brass point).

Wow! That's the smallest plug set I've seen. I'm used to the ones with the sticky stringy thing used for car and motorcycle tires. I didn't know such small ones existed. I've always been against using a sealant in my tires thinking that it really messes up the wheel. You don't mind that? Do you put the sealant in the tire only when you have a flat or is it something you leave in there?

And back to part of my question... if the bike claims to be "tubeless ready" does that mean there is presently a tube in the tire? And would the tire be the same (just without the tube) or is it a different tubeless tire that you have to use?

That was a very helpful reply... Thank you!
 
I believe generally - for example, my ToughRoad - it’s been shipped with a tube, which you or the bike shop can remove, add a tubeless valve, and you’re ready to go. Tubeless Ready also refers to the wheels being made to support tubeless without modification.

Love tubeless, but as stated above, it’s a very good idea to have a tube - and therefore a few patches too - on board. While the tour journals are full of people who ran the entire Tour Divide - Banff to the Mexican border - without a single leak on tubeless tires, one good ragged cut can still put you out of business out In the bushes or wherever.

At the moment I have a tube in my rear tire while awaiting a replacement tire after a good tear defeated my sealant. Still don’t know how that happened. Off to the Adirondacks today for a few days of riding, with a second tube in the bag.

And David’s setup is classic, but I would add a small pair of needle nose pliers or a leatherman to pull out stuck wires from thick tires. I bet he has it, just didn’t show it!
 
So, what are the pros and cons of tubeless tires on bicycles?

Thanks for your comments.

Pros
Less flats
Tubeless tyres no doubt puncture as often as tyres with tubes, but they don’t always flat due to the liquid sealant mending the puncture. The tubeless setup rules out pinch flats completely, and dramatically lessens the danger of blowouts with the liquid sealant. This has a huge impact on the number of flats you’re likely to experience.

More speed
Clincher tyres have a level of friction between the tube and the tyre that tubeless tyres eliminate, lessening rolling resistance and making them faster.

Comfort
Tubeless tyres can be run at a lower pressure (dropping about 15-20 psi) without sacrificing performance. This can enhance your corner grip, traction, and overall comfort. You can even venture off road with the tyres being a lot more forgiving than if they were running at full pressure.

Possible weight saving. Depending on the size and type of tyre and also the type and volume of sealant required, a tubeless setup may offer weight savings.

Cons
Cost & compatibility
Initial setup cost may be prohibitive, as some rims may not allow conversion to a tubeless setup.

Possible difficulty in fitting
As a system that depends on tight seals and high pressure, installing or removing the tyre can be a difficult and frustrating job until you have done it a few times and gained experience.

Ongoing maintenance
The sealant requires periodic topping up as it’s performs it function, or due to drying out in hot conditions.

For me commuting +16,000km (10,000 miles) annually, the pros far outweigh the cons

Tubeless ready means what it says. The rims are designed and ready for a tubeless setup if you wish to convert.
 
I've always been against using a sealant in my tires thinking that it really messes up the wheel. You don't mind that? Do you put the sealant in the tire only when you have a flat or is it something you leave in there?
I have months, rather than years, of exprience with tubeless tyres – but that can be a help as I'm learning from experience which includes mistakes!

Fitting tyres has been straightforward. I have a Topeak Joe Blow Booster which is one of those pumps with a high pressure reservoir next to the main pumping barrel. When the reservoir has reached its maximum pressure (11 bar) the air is emptied into the tyre with a whoosh and, hopefully, several popping sounds as the tyre seats properly. Fourth time lucky for me but, I suspect, it will be quicker next time.

Only after the tyre is properly seated is the sealant added through the valve hole. Don't even think of adding the sealant beforehand!

I do carry a small 120 mL bottle of sealant as part of my puncture repair kit.
 
I believe generally - for example, my ToughRoad - it’s been shipped with a tube, which you or the bike shop can remove, add a tubeless valve, and you’re ready to go. Tubeless Ready also refers to the wheels being made to support tubeless without modification.

Love tubeless, but as stated above, it’s a very good idea to have a tube - and therefore a few patches too - on board. While the tour journals are full of people who ran the entire Tour Divide - Banff to the Mexican border - without a single leak on tubeless tires, one good ragged cut can still put you out of business out In the bushes or wherever.

At the moment I have a tube in my rear tire while awaiting a replacement tire after a good tear defeated my sealant. Still don’t know how that happened. Off to the Adirondacks today for a few days of riding, with a second tube in the bag.

And David’s setup is classic, but I would add a small pair of needle nose pliers or a leatherman to pull out stuck wires from thick tires. I bet he has it, just didn’t show it!

Thank you for your helpful reply, Dave. Clarifies a lot of it for me.

I've always got my Leatherman in my bag! :)
 
The sealant requires periodic topping up as it performs its function, or due to drying out in hot conditions.
My Trek Powerfly 5 was set up with Bontrager sealant. The Bontrager tyres' walls are noticeably porous with sealant weeping through the sidewalls at an alarming rate. The tyres must be pumped up before every ride.

My R&M Homage's Schwalbe Rock Razors are filled with Finish Line sealant which was designed as a non-drying product (a claim no longer made). Although the Schwalbe tyres hold their pressure far better than the Bontragers, I'm yet to be convinced that the Finish Line sealant is up to the job of plugging small holes.
 
Pros
Less flats
Tubeless tyres no doubt puncture as often as tyres with tubes, but they don’t always flat due to the liquid sealant mending the puncture. The tubeless setup rules out pinch flats completely, and dramatically lessens the danger of blowouts with the liquid sealant. This has a huge impact on the number of flats you’re likely to experience.

More speed
Clincher tyres have a level of friction between the tube and the tyre that tubeless tyres eliminate, lessening rolling resistance and making them faster.

Comfort
Tubeless tyres can be run at a lower pressure (dropping about 15-20 psi) without sacrificing performance. This can enhance your corner grip, traction, and overall comfort. You can even venture off road with the tyres being a lot more forgiving than if they were running at full pressure.

Possible weight saving. Depending on the size and type of tyre and also the type and volume of sealant required, a tubeless setup may offer weight savings.

Cons
Cost & compatibility
Initial setup cost may be prohibitive, as some rims may not allow conversion to a tubeless setup.

Possible difficulty in fitting
As a system that depends on tight seals and high pressure, installing or removing the tyre can be a difficult and frustrating job until you have done it a few times and gained experience.

Ongoing maintenance
The sealant requires periodic topping up as it’s performs it function, or due to drying out in hot conditions.

For me commuting +16,000km (10,000 miles) annually, the pros far outweigh the cons

Tubeless ready means what it says. The rims are designed and ready for a tubeless setup if you wish to convert.

Excellent reply! Thank you! You've answered a lot for me.

I am though, surprised that you say tubeless can be run at a lower pressure. I would have thought the opposite, due to the importance of maintaining the bead seal. I'm not disputing what you say, but I am surprised.

Cheers!
 
I have months, rather than years, of exprience with tubeless tyres – but that can be a help as I'm learning from experience which includes mistakes!

Fitting tyres has been straightforward. I have a Topeak Joe Blow Booster which is one of those pumps with a high pressure reservoir next to the main pumping barrel. When the reservoir has reached its maximum pressure (11 bar) the air is emptied into the tyre with a whoosh and, hopefully, several popping sounds as the tyre seats properly. Fourth time lucky for me but, I suspect, it will be quicker next time.

Only after the tyre is properly seated is the sealant added through the valve hole. Don't even think of adding the sealant beforehand!

I do carry a small 120 mL bottle of sealant as part of my puncture repair kit.

Dave Berry? The comedian? :)

I'll look into that pump... that's a floor pump, isn't it? What do you take with you on rides? Or are you hoping that the sealant and a regular pump will do the trick?

If you're on a tour and have a flat and want to put a tube in, can anyone answer about what's involved? Does the sealant make such a mess that you're not easily able to put a tube in the tire? And even with a tube, the tire being tubeless must have the bead properly seated on the rim, no? Meaning it would take a real high pressure pump to do this. It's one thing to change the tire/tube in your garage at home and entirely another thing to do so on a tour. At night. In the rain. :)
 
My Trek Powerfly 5 was set up with Bontrager sealant. The Bontrager tyres' walls are noticeably porous with sealant weeping through the sidewalls at an alarming rate. The tyres must be pumped up before every ride.

My R&M Homage's Schwalbe Rock Razors are filled with Finish Line sealant which was designed as a non-drying product (a claim no longer made). Although the Schwalbe tyres hold their pressure far better than the Bontragers, I'm yet to be convinced that the Finish Line sealant is up to the job of plugging small holes.
My initiation into tubeless began using Schwalbe Marathon Evolution MicroSkin / TL-Easy tyres coupled with Schwalbe Doc Blue Tubeless Sealant
Both performed very well and I was happy with my conversion to a tubeless setup
When I needed to buy another bottle of the Schwalbe Doc Blue sealant, it wasn’t in stock with my regular online shop so I tried Stan's NoTubes Tubeless Sealant as a substitute. I found it performed better than the Schwalbe Doc Blue Tubeless Sealant.
I read a review on Caffélatex Tubeless Sealant on a MTB site and thought I would give it a try after I had used up my Stan’s
I was no happy at all with Caffélatex and reverted back to Stan’s immediately
I have never considered changing from the Schwalbe Marathon Evolution tyres, as I find they suit my needs very well and tick all my boxes
 
If you're on a tour and have a flat and want to put a tube in, can anyone answer about what's involved? Does the sealant make such a mess that you're not easily able to put a tube in the tire? And even with a tube, the tire being tubeless must have the bead properly seated on the rim, no? Meaning it would take a real high pressure pump to do this. It's one thing to change the tire/tube in your garage at home and entirely another thing to do so on a tour. At night. In the rain. :)
If you are unfortunate in not being able to mend a tubelesss flat out on the road and want to use a tube to get you going again, here is a suggested insurance policy https://gaadi.de/?lang=en
Yes, it can be messy if the tubeless sealant hasn’t completely discharged from the tyre, but break the tyre bead and flush out the remaining sealant with your water bottle, before removing the tubeless valve and inserting a Gaadi tube
This will get you going again to a place where you can comfortably repair or replace the damaged tyre and top up the tubeless sealant again
A tubeless rated tyre and rim with a Gaadi tube fitted will still seat properly and does not require a high pressure pump to seal
Just make sure that when you buy the Gaadi tube that it’s valve stem isn’t a bigger diameter than the tubeless valve as it may not fit through the hole in the rim
 
Last edited:
Excellent reply! Thank you! You've answered a lot for me.

I am though, surprised that you say tubeless can be run at a lower pressure. I would have thought the opposite, due to the importance of maintaining the bead seal. I'm not disputing what you say, but I am surprised.

Cheers!
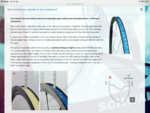
Tubeless ready rims have deeper/longer tyre bead engagement grooves and therefore holds the bead better allowing lower pressures to be used
Have a read here https://www.schwalbetires.com/tech_info/tubeless under Technology - Tubeless for more detail
 

Attachments

  • B910AD73-8958-49B4-8DAC-09ABD80BF651.png
    B910AD73-8958-49B4-8DAC-09ABD80BF651.png
    779.7 KB · Views: 506
Last edited:
Only after the tyre is properly seated is the sealant added through the valve hole. Don't even think of adding the sealant beforehand!
.

Nah, it's relatively easy if you fit the last section of tyre with the wheel vertical / pour the sealant in just before seating the last 1/4 or tyre. Just make sure the valve is at 3 o'clock with that section of tyre at 6 , and then roll the tyre to have the valve at 9/ last bit of tyre at 12 . ( so the sealant flows to an area that's fitted and doesn't spray out of the valve)
 
Back