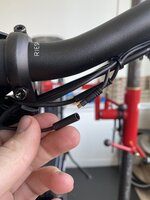
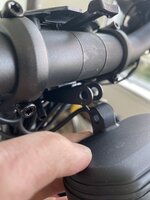
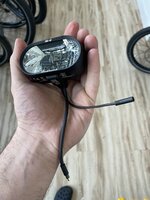
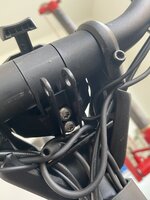
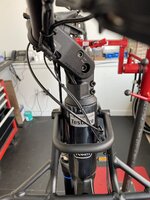
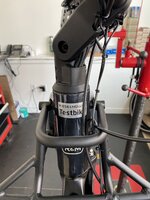
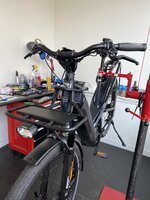
Step-By-Step For Relocating Headlight to Underside of Front Carrier

JVBulman

Well-Known Member
Region
USA
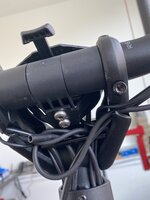
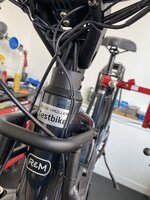
Below are the directions for relocating the headlight from the handlebars to the underside of the Front Carrier. The bike we used is a 2021 Homage GT Rohloff HS with the Comfort Package and the Nyon Cockpit set to the highest angle that the cables would allow.

----

The parts required are Light Bracket for Front Carrier (VBK0357) and Cable Extension Set for Front Light w/ U Power Connector (VBK0358) Note you will need two Cable Extensions if you have high-beams.
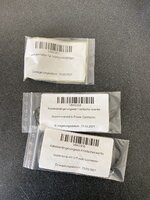
parts01.jpgparts02.jpg

1. Start by disconnecting the headlight power cable connector and high-beam button connector.
fig02.jpgfig03.jpg

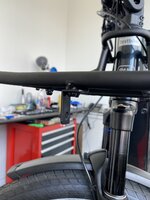
2. Next remove the headlight from the light bracket and remove the light bracket.
fig04.jpgfig05.jpgfig06.jpgfig07.jpgfig08.jpg

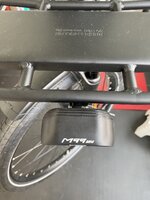
3. Mount the new Front Carrier bracket to the middle eyelet on underside of the Front Carrier and mount the headlight to this new bracket, checking that it is centered.
fig09.jpgfig10.jpg

4. Install the Cable Extensions.
fig11.jpg

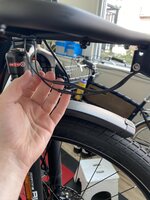
5. Attach the Cable Extensions to the underside of the Front Carrier using zip ties. Our high-beams button was on the left side of the handlebar, and we found that running the Extensions along the same side of the Carrier was required for there to be enough slack to turn the handlebars in either direction without putting stress on the cables.
fig12.jpgfig13.jpgfig14.jpgfig15.jpg

6. Done!
fig16.jpg

I hope you all found this helpful! Feel free to post any questions about the process.
 
Last edited:
I am looking at going the reverse route as I now have a Roadster Vario that was originally configured with the light mounted on the front rack. As I do not wish to use the front rack I am looking at moving the light onto the stem as SuperNova now have this as a stem mount. (SNL398607) I will remove the Roadster front rack stem mount and replace it with this and the appropriate spacers.

Cheers Stephen.

1617942687916.png
 
Below are the directions for relocating the headlight from the handlebars to the underside of the Front Carrier. The bike we used is a 2021 Homage GT Rohloff HS with the Comfort Package and the Nyon Cockpit set to the highest angle that the cables would allow.
It was very nice of you to take the time to post this :)

Marc
 
This is the cost for the parts:

R&M part nr. VBK0358
VBK0358 Cable extension set for front light Supernova with U
Power Connector
2 $12.00 $24.00*

R&M part nr. VBK0357
VBK0357 Light bracket kit for front carrier 1 $30.00 $30.00*

The shipping to the bike shop from Germany is expensive and the wait will be at least a month. Expect to pay over $45 to $85 for shipping.
I live in the UK, so I am hoping the shipping will not be that much!
 
My 2018 SuperCharger GX came with a Busch & Muller IX-Q already mounted underneath the front rack (a little further back towards stem) & when i purchased one of these https://www.thule.com/en-au/bike-pa...nniers-and-bike-bags/thule-tour-rack-_-100090 i had to relocate it to the handlebars to allow for clearance of the front fork suspension travel.
After mounting the light to the handlebars i noticed when using the light during the day it finally was using it's own "daylight mode" (light sensor making it less bright), the previous location was blocking light from reaching the sensor.
Do the Supernova's have a similar thing?
I know this is an old post but the link provided goes to a Thule rear rack, so what you're saying about the need to reposition your front light doesn't really scan.
 
Below are the directions for relocating the headlight from the handlebars to the underside of the Front Carrier. The bike we used is a 2021 Homage GT Rohloff HS with the Comfort Package and the Nyon Cockpit set to the highest angle that the cables would allow.

----

The parts required are Light Bracket for Front Carrier (VBK0357) and Cable Extension Set for Front Light w/ U Power Connector (VBK0358) Note you will need two Cable Extensions if you have high-beams.
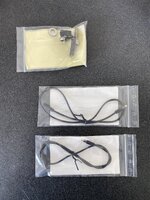
View attachment 83675View attachment 83676

1. Start by disconnecting the headlight power cable connector and high-beam button connector.
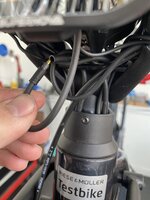
View attachment 83677View attachment 83678

2. Next remove the headlight from the light bracket and remove the light bracket.
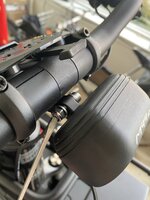
View attachment 83679View attachment 83680View attachment 83681View attachment 83682View attachment 83683

3. Mount the new Front Carrier bracket to the middle eyelet on underside of the Front Carrier and mount the headlight to this new bracket, checking that it is centered.
View attachment 83684View attachment 83685

4. Install the Cable Extensions.
View attachment 83686

5. Attach the Cable Extensions to the underside of the Front Carrier using zip ties. Our high-beams button was on the left side of the handlebar, and we found that running the Extensions along the same side of the Carrier was required for there to be enough slack to turn the handlebars in either direction without putting stress on the cables.
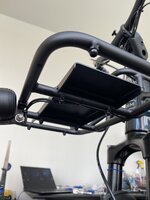
View attachment 83687View attachment 83688View attachment 83689View attachment 83690

6. Done!
View attachment 83691

I hope you all found this helpful! Feel free to post any questions about the process.
Many thanks for this. I've just acquired the re-fixing kit, only to find that my front rack doesn't have a central eyelet on the front rail. It appears in every other way to be identical to the rack you show in your last photo. Weird, or what? I'm wondering if I can fit the bracket to an eyelet beneath the steel plate, which would mean it is off to one side and further back. Would this work?
 
Back