RPB RADMINI STEP-THRU - CYCLE OR SCOOT

Braking News
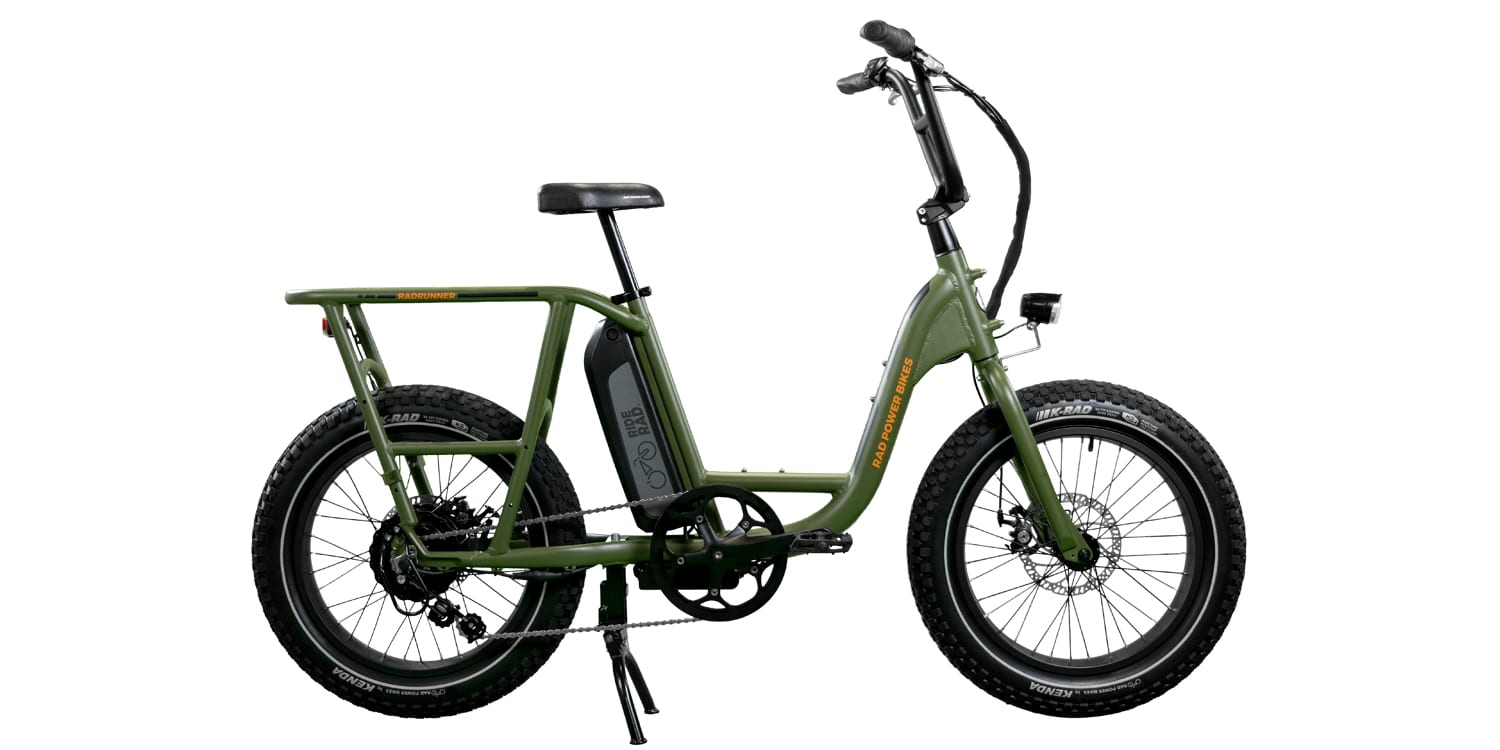
Over the past few years the RADMini design has evolved with 3 or 4 significant changes since it was first introduced. Quickly becoming a popular take along for side trips by vacationers, many also serve as the main transportation for riders around the country. They can perform all the same duties as the full size bikes even though the design is specific for easy foldup and stowing, and so their compact design shows some differences in handling compared to its bigger siblings. Some good and some, not so good.
The RADMini is a natural for traversing all sorts of terrain, and more capable of running off-road than the RADCity design from RAD Power Bikes, even with better maneuverability in tighter places than the full size Rover. The 20" fat tires can handle the soft sand common to the SoCal Mojave Desert, but by the same token, can also slide easily if confronting a layer of soft sand sitting on the hard paved roadways. That is all too common in my area, dumped there when the rain turns the roads into rivers. It plays havoc with tires. Cars and pickups are not exempt, and the drivers will stay at a fast rate in order to prevent getting stuck. Unfortunately remaining unstuck has more priority for them than the safety of others using that road.
For all the fun the dunes provide when I'm out booney hopping, it can also really suck if not keeping oneself alert to the possible dangers it sometimes can present. All the RAD bikes have tires that will do well in soft sand. The fat tires do better by rolling over the sand instead of cutting through it as narrower tires do. Assuming the tire pressure has been lowered sufficiently, following a straight path through sand when on narrower tires like those mounted on RADCity bikes, the pace must be kept at a faster rate of speed to lessen the chances of soft sand redirecting the bike completely off the trail. If necessary to apply the brakes, soft sand can also influence the fat tires in the same way, and the RADMini tires are more vulnerable than the bigger Juggernauts on my Rover. A hard pull on the front brake can lock up the front wheel when in soft sand, usually forcing the steering to turn to the side and the rider is suddenly introduced to a close-up examination of the sand. Even at a speed under 5 mph the rider can be thrown hard enough to slide. Sometimes putting a foot down if still going slow enough will prevent being toppled. But in an unexpected sudden braking such as to avert an impending collision, scoring a ten point landing is usually the result, just like scoring with a spectacular slide into home plate.
There may be several mechanical fixes that prevent front wheel lockup from braking too hard. How effective they are when in soft sand is questionable as to whether the cost is really worth it since the prime concern is to keep the front wheel guided straight ahead. The best practice is just to leave the front brake control alone and let the RAD rear brake do the necessary slowing. IMHO it's a good practice for all bikes when traversing soft sand to refrain from braking unless really necessary. This may not be a common condition when out riding, but identifying this risk whenever it is present leads to safely treading through it or steering around it and avoiding it entirely.
 
STABILIZE A STEP-THRU BATTERY
While performing routine maintenance I always finish up by checking for missing or loose bolts and will look for anything that seems abnormal. In one such check I noticed some wobble in the battery. Now that didn't seem right. The battery should sit perfectly solid, so I removed the battery from its mount and discovered the two 3mm retaining bolts that hold the mount to the frame had both loosened up. The bottom bolt was missing the nut, and the top one was loose. I keep lots of spare bolts so it was no problem replacing the missing 3mm nut and after tightening both, the mount was stationary and solid as supposed to be. Everything was fine for a couple of weeks when I again noticed the wobble in the battery. This time not as bad and all that was required was tightening both bolts again, and all was fine.
However, this time I called RPB Support and they had nothing to offer as a suggestion, so I took a look at the situation to see if I could find a fix. I did, and it works.
First of all, there has to be an excessive amount of vibration at that point to be loosening up the screws. So what I determined was there needs to be a way to dampen the vibration. The best way was to attach some 1/4" hard foam weather-strip tape cut into 2 inch square pieces. There is excellent adhering tape on the back side and placed them at the point on both sides of the battery where it rests in the surrounding frame common to all the RPB Step-Thru bikes. This is a very tight fit but still allows slipping the battery on and off its mount with no extra effort. Now after several months using my RADMini every day, the mount has not loosened up at all during that time.
Since I also have a RADCity Step-Thru, taping all my batteries allows switching them as needed and also provides the vibration damping where applicable without interfering with anything on my hi-step RADMini.

OTHER STUFF
While you have the battery off the bike, now is a good time to give it a closer look. On the under side there is a dead bolt for locking the battery into its mount. Check that the two Phillips screws next to it are tight. I have had a couple loosen up, and actually lost one. So I went back to my bolt assortment and dug out a replacement. These screws hold the key locking mechanism for the battery in place, and if both screws are missing then the lock falls inside the battery and may require some time and intricate manipulation to get it positioned correctly again.
Just down from the dead bolt are two fuses. One 40A and the other is 5A. They are easily replaced and someone was good enough to provide a video on Youtube that describes checking and changing these fuses when necessary. Just do a Youtube search for "Battery fuses RAD Power Bikes" and it should be the first video listed in the results.

Happy Trails...
 

Attachments

  • IMG_0001.jpg
    IMG_0001.jpg
    246.7 KB · Views: 564
  • IMG_0003.jpg
    IMG_0003.jpg
    633.2 KB · Views: 551
  • IMG_0006.jpg
    IMG_0006.jpg
    311.9 KB · Views: 532
  • IMG_0008.jpg
    IMG_0008.jpg
    580.9 KB · Views: 545
RADMini Easy Handlebar Fix

Hopping onto my new RADMini Step-Thru the first time, I immediately noticed the distance between me and handlebars had me leaning forward, a position that puts extra weight on the grips while also bending my back forward, making it vulnerable to the jolts of hitting bumps, pot holes, whatever. I took a minute to look the situation over and saw that the handlebars could be positioned 4 or 5 inches closer to the rider just by turning the stem around 180 degrees. It took about 5 minutes just to remove four bolts and loosen the stem bolts, position the handlebars and tighten it all back up again with nothing else to adjust or fix. I still get the full range of steering and it hasn't interfered with fold up so turns out to be the easiest handlebar fix I have ever made and now has me sitting upright while riding. This little fix may also be suitable for the other RADMini models as well.
Hi Banzai,
I am a new owner of the Rad Mini Step Thru 2 and am noticing the same problem that you did with the handlebars being too far away. I would love to try your fix, but I don’t trust myself to know exactly what to do to spin the stem around like you described here. Would you mind posting some sort of photos or video or something to help walk me through how you fixed yours? I tried scouring the internet for more information but you seem to be the only one who has figured this out and executed it. I would really appreciate it! Thank you!!
 
LOL. Hi HJ19,
Not everyone has a mechanical background. I've been rebuilding car and truck engines and all sorts of motorcycle engines all my life - not as an occupation, but just in my spare time. I have a collection of tools and a place to work on these things that many people don't have.
Bikes are probably the easiest of all mechanical devices to work on, so if you doubt your own ability to make a simple adjustment with your handlebars, then I suggest not to. Also, it's not the only available fix. I placed a swept back set of handlebars on my other RADMini. So I would suggest instead that you take the time to dream up a better handlebar arrangement, such as what RPB designed for the adjusting handlebars on the RADCity ST. Possibly a local bike shop will do the job. Be a real hero!
 
THE EAS‪IEST EVER RADMINI HANDLEBAR FIX - THE DELUXE VERSION

To clear up any possible confusion about what spinning the stem 180 degrees means:
There are 360 degrees in a complete circle.
If you spin something completely all the way around and stop at its original position, then you have spun it 360 degrees.
180 is half of 360. Turning something 180 degrees means it is no longer facing forward, but is now facing the exact opposite direction.
This mod turns the stem 180 degrees in order to place the handlebars about 5 inches closer to the rider. Doing so allows the rider to sit more comfortably with less bend in the back while also taking much of the weight off of the wrists.

There are only three major components involved in this little mod:
The LED screen
The Handlebars
The Stem - The stem is made of aluminum and holds the handlebars onto the bike's front tube.

1. The LED screen.
Use the hex keys from tool kit supplied with your ebike or purchase a better set with handles and undo the little bolts that hold the LED screen to the handlebars. CAREFULLY and SLOWLY spread the holding brackets just enough to slip it off the handlebars and let it dangle by it's wires. No need to disconnect it.

2. Handlebars.
There are four bolts that hold the handlebars firmly at the front of the stem using a rounded face plate. Remove those four bolts and the face plate will pull off allowing the handlebars to be pulled from the stem. No need to disconnect anything else and carefully let the handlebars dangle out of the way.

Image 0016
IMG_0016.JPG

This is what you see after removing the LED Screen and the handlebar assembly. Notice the stem and star-bolt have been loosened because the stem has dropped a little bit. Now you can turn the stem 180 degrees locating the center of the stem even with the bolt head that appears in the groove on the upper extension (See Image 0005). Tighten the star-bolt to pull the stem upward snug and then snug up the two stem bolts so it won't move when replacing the handlebars.

3. The Stem
Loosen the two bolts going through the rear end of the stem. This will loosen the stem and allow it to be rotated 180 degrees so it will be facing the rider. There is also a cap on top of the stem with a little rubber plug that pulls out and reveals a hex bolt. This bolt cinches up the stem to the star-nut inside the front tube and it holds the stem down tightly onto the front tube of the ebike. That bolt needs to be loosened just enough to allow the stem to spin and then once the center of the stem is lined up with the bolt head sitting in the groove on the upper steering tube, snug it back up temporarily along with the two bolts that hold the stem in place so the stem won't move. The stem may need further adjustment so don't tighten anything to the max yet - just snug enough to keep the stem from moving while repositioning the handlebars.
Now place the handlebars back into the stem facing exactly the same way as when removed. The difference is you are now replacing them onto the rear of the stem instead of up front. Be sure none of the cables were crossed while it was dangling in the way of things.
Center the handlebars in the mount and replace the holding plate back into position and then snug up the bolts evenly in a cross-pattern. Tightening each bolt a little at a time will prevent the face plate from cracking. Keep the front plate spacing even (watch the video that I listed below from Park Tool) and when ready to do all the final bolt tightening, use a torque wrench set at 10Nm on each bolt. BTW The bolt specs are listed in the owners manual on page 11 and I included a link so it can be downloaded from RPB. Use a torque wrench so you don't overtighten the bolts and strip them out. If you strip the bolts or crack the front face plate, then you will need to get a new stem. Don't panic, Amazon has plenty of them at low prices, but more about that later.
Now the handlebars can be aligned with the center of the front wheel. That's easy. Hop onto your scoot and it should be easy to see when the handlebars are properly aligned with the front wheel so you can coast forward in a perfectly straight line. Loosening the clamp for the upper extension also gives a little bit of play that can make this alignment perfect when the clamp is tightened back up. Also check the tilt of the handlebars to make sure that the levers are sitting within reach. Loosen the bolts so the handlebars can be centered and aligned as necessary and then do a final tightening using a torque wrench.
You are almost done. Now you are ready for final tightening on the stem clamp bolts. First tighten down the star bolt to about 4Nm and put the little dust plug back into the bolt head. Now fully tighten up the the two stem bolts using your torque wrench set to 15Nm. When tight the stem should not move at all.
Last is to CAREFULLY slip the LED Screen bracket back onto the handlebars, position them for best view of the screen and tighten down the holding screws just enough to prevent the screen from moving. ALL DONE!

Image 0007
IMG_0007.JPG

This is the completed modification. The stem is now facing the rider and everything else is in position and the bike is ready to ride.

Image 0005
IMG_0005.JPG

After completing the mod, this is the view of the handlebar assembly from the riders position. Notice the bolt head just below the stem. When the center of the stem is aligned with that bolt, the stem will be positioned correctly at exactly 180 degrees.

This isn't the only handlebar setup that will work, but this mod won't interfere with folding up the RADMini. Amazon has a wide selection of stems and handlebars so if you need to extend the handlebars further or want an adjustable or tilting handlebars, then be sure the stem you purchase has the same diameter holes for mounting as the RAD(Steering Tube diameter: 28.6mm (1-1/8"), Handlebar Diameter: 31.8mm). Not all mods will allow proper bike fold-up and one big warning before you start is to consider that some changes can void the warranty that RPB puts on their ebikes. This mod is just a basic handlebar adjustment, so have fun...

ADDITIONAL INFO

SWITCHING THE STEM
I changed to a different RPB stem on my RADMini while doing this mod.

Image 0017
IMG_0017.JPG

This stem was removed from my Rover when I replaced it with Jones H-Bars and a high-rise stem. RPB is good about keeping the specs of their bike parts the same as much as possible. In other words, if I break a lever on my Rover, I can pull a lever from my Mini and use it temporarily with a perfect fit until my order for a replacement lever arrives. This stem is elongated by a few more inches and so it sets the handlebars a few more inches to the rear allowing for better control and seating positioning.

Image 0021
IMG_0021.JPG

Installation is now complete and notice everything is back in position. I had to clip a couple of wire ties to loosen up a couple of wires because of the longer distance to the handlebars. The center cap is tight and the rubber dust plug is back in place. The two stem clamping bolts are tightened to 15Nm, and the handlebars and LED screen have been positioned and my ebike is ready to ride. The Amazon adjustable stem shown in one of the links I provided offers even more adjustment and will fit perfectly and might be the best fix for someone.


ABOUT TORQUE WRENCHES

Park Tool is my main source for the tools purely intended for working on bikes. Otherwise, tools like a torque wrench are so abundantly found elsewhere that there is a significant savings over a name brand charging two or three times as much with equal reliability. Although some mechanics believe they have arms with a built-in torque wrench, relying on an actual torque wrench instead will prevent stripping out threads or cracking a vulnerable handlebar retaining plate. Always best to use a torque wrench when prescribed. Metric measurements are commonly used when working on bikes so most of the tools intended for use with bikes are calibrated according to metric standards. Sockets, wrenches, and hex tools are all in millimeters (MM) and the torque wrenches are calibrated in Newton Meters (Nm). Some have both metric and SAE (better known as American measurement standards), but the vast majority of torque wrenches used for bikes seldom need to exceed 20Nm. Doing rear axle, bottom bracket, and crank assembly work will require a heavier torque value. Having a couple of extension rods will reach those hard to get places, and hearing an unmistakable snap when reaching the prescribed torque is a nice convenience.
This Amazon link shows several torque wrench sets listed at $50 or less. Individual wrenches set at 5, 10, 15, and 20 Nm is also an excellent way to go especially if you already have a collection of extensions, sockets, and hex tip sockets in your tool box.


VIDEOS & REFERENCES

Park Tool handlebar mounting tips video

Technical Bulletin: RadMini Stem Riser Clamp Bolt Tightening Guide - 2020 Models

Download RPB Owner Manuals

Harbor Freight Excellent Allen Key Set

Amazon Adjustable Stem at a ridiculous low price

Bolton has also mentioned the adjustable stem recently.
 
Last edited:
THE EAS‪IEST EVER RADMINI HANDLEBAR FIX - THE DELUXE VERSION

To clear up any possible confusion about what spinning the stem 180 degrees means:
There are 360 degrees in a complete circle.
If you spin something completely all the way around and stop at its original position, then you have spun it 360 degrees.
180 is half of 360. Turning something 180 degrees means it is no longer facing forward, but is now facing the exact opposite direction.
This mod turns the stem 180 degrees in order to place the handlebars about 5 inches closer to the rider. Doing so allows the rider to sit more comfortably with less bend in the back while also taking much of the weight off of the wrists.

There are only three major components involved in this little mod:
The LED screen
The Handlebars
The Stem - The stem is made of aluminum and holds the handlebars onto the bike's front tube.

1. The LED screen.
Use the hex keys from tool kit supplied with your ebike or purchase a better set with handles and undo the little bolts that hold the LED screen to the handlebars. CAREFULLY and SLOWLY spread the holding brackets just enough to slip it off the handlebars and let it dangle by it's wires. No need to disconnect it.

2. Handlebars.
There are four bolts that hold the handlebars firmly at the front of the stem using a rounded face plate. Remove those four bolts and the face plate will pull off allowing the handlebars to be pulled from the stem. No need to disconnect anything else and carefully let the handlebars dangle out of the way.

Image 0016
View attachment 68027
This is what you see after removing the LED Screen and the handlebar assembly. Notice the stem and star-bolt have been loosened because the stem has dropped a little bit. Now you can turn the stem 180 degrees locating the center of the stem even with the bolt head that appears in the groove on the upper extension (See Image 0005). Tighten the star-bolt to pull the stem upward snug and then snug up the two stem bolts so it won't move when replacing the handlebars.

3. The Stem
Loosen the two bolts going through the rear end of the stem. This will loosen the stem and allow it to be rotated 180 degrees so it will be facing the rider. There is also a cap on top of the stem with a little rubber plug that pulls out and reveals a hex bolt. This bolt cinches up the stem to the star-nut inside the front tube and it holds the stem down tightly onto the front tube of the ebike. That bolt needs to be loosened just enough to allow the stem to spin and then once the center of the stem is lined up with the bolt head sitting in the groove on the upper steering tube, snug it back up temporarily along with the two bolts that hold the stem in place so the stem won't move. The stem may need further adjustment so don't tighten anything to the max yet - just snug enough to keep the stem from moving while repositioning the handlebars.
Now place the handlebars back into the stem facing exactly the same way as when removed. The difference is you are now replacing them onto the rear of the stem instead of up front. Be sure none of the cables were crossed while it was dangling in the way of things.
Center the handlebars in the mount and replace the holding plate back into position and then snug up the bolts evenly in a cross-pattern. Tightening each bolt a little at a time will prevent the face plate from cracking. Keep the front plate spacing even (watch the video that I listed below from Park Tool) and when ready to do all the final bolt tightening, use a torque wrench set at 10Nm on each bolt. BTW The bolt specs are listed in the owners manual on page 11 and I included a link so it can be downloaded from RPB. Use a torque wrench so you don't overtighten the bolts and strip them out. If you strip the bolts or crack the front face plate, then you will need to get a new stem. Don't panic, Amazon has plenty of them at low prices, but more about that later.
Now the handlebars can be aligned with the center of the front wheel. That's easy. Hop onto your scoot and it should be easy to see when the handlebars are properly aligned with the front wheel so you can coast forward in a perfectly straight line. Loosening the clamp for the upper extension also gives a little bit of play that can make this alignment perfect when the clamp is tightened back up. Also check the tilt of the handlebars to make sure that the levers are sitting within reach. Loosen the bolts so the handlebars can be centered and aligned as necessary and then do a final tightening using a torque wrench.
You are almost done. Now you are ready for final tightening on the stem clamp bolts. First tighten down the star bolt to about 4Nm and put the little dust plug back into the bolt head. Now fully tighten up the the two stem bolts using your torque wrench set to 15Nm. When tight the stem should not move at all.
Last is to CAREFULLY slip the LED Screen bracket back onto the handlebars, position them for best view of the screen and tighten down the holding screws just enough to prevent the screen from moving. ALL DONE!

Image 0007
View attachment 68028
This is the completed modification. The stem is now facing the rider and everything else is in position and the bike is ready to ride.

Image 0005
View attachment 68029
After completing the mod, this is the view of the handlebar assembly from the riders position. Notice the bolt head just below the stem. When the center of the stem is aligned with that bolt, the stem will be positioned correctly at exactly 180 degrees.

This isn't the only handlebar setup that will work, but this mod won't interfere with folding up the RADMini. Amazon has a wide selection of stems and handlebars so if you need to extend the handlebars further or want an adjustable or tilting handlebars, then be sure the stem you purchase has the same diameter holes for mounting as the RAD(Steering Tube diameter: 28.6mm (1-1/8"), Handlebar Diameter: 31.8mm). Not all mods will allow proper bike fold-up and one big warning before you start is to consider that some changes can void the warranty that RPB puts on their ebikes. This mod is just a basic handlebar adjustment, so have fun...

ADDITIONAL INFO

SWITCHING THE STEM
I changed to a different RPB stem on my RADMini while doing this mod.

Image 0017
View attachment 68030
This stem was removed from my Rover when I replaced it with Jones H-Bars and a high-rise stem. RPB is good about keeping the specs of their bike parts the same as much as possible. In other words, if I break a lever on my Rover, I can pull a lever from my Mini and use it temporarily with a perfect fit until my order for a replacement lever arrives. This stem is elongated by a few more inches and so it sets the handlebars a few more inches to the rear allowing for better control and seating positioning.

Image 0021
View attachment 68032
Installation is now complete and notice everything is back in position. I had to clip a couple of wire ties to loosen up a couple of wires because of the longer distance to the handlebars. The center cap is tight and the rubber dust plug is back in place. The two stem clamping bolts are tightened to 15Nm, and the handlebars and LED screen have been positioned and my ebike is ready to ride. The Amazon adjustable stem shown in one of the links I provided offers even more adjustment and will fit perfectly and might be the best fix for someone.


ABOUT TORQUE WRENCHES

Park Tool is my main source for the tools purely intended for working on bikes. Otherwise, tools like a torque wrench are so abundantly found elsewhere that there is a significant savings over a name brand charging two or three times as much with equal reliability. Although some mechanics believe they have arms with a built-in torque wrench, relying on an actual torque wrench instead will prevent stripping out threads or cracking a vulnerable handlebar retaining plate. Always best to use a torque wrench when prescribed. Metric measurements are commonly used when working on bikes so most of the tools intended for use with bikes are calibrated according to metric standards. Sockets, wrenches, and hex tools are all in millimeters (MM) and the torque wrenches are calibrated in Nanometers (Nm). Some have both metric and SAE (better known as American measurement standards), but the vast majority of torque wrenches used for bikes seldom need to exceed 20Nm. Doing rear axle, bottom bracket, and crank assembly work will require a heavier torque value. Having a couple of extension rods will reach those hard to get places, and hearing an unmistakable snap when reaching the prescribed torque is a nice convenience.
This Amazon link shows several torque wrench sets listed at $50 or less. Individual wrenches set at 5, 10, 15, and 20 Nm is also an excellent way to go especially if you already have a collection of extensions, sockets, and hex tip sockets in your tool box.


VIDEOS & REFERENCES

Park Tool handlebar mounting tips video

Technical Bulletin: RadMini Stem Riser Clamp Bolt Tightening Guide - 2020 Models

Download RPB Owner Manuals

Harbor Freight Excellent Allen Key Set

Amazon Adjustable Stem at a ridiculous low price

Bolton has also mentioned the adjustable stem recently.
Banzai
Much appreciated! Can’t wait to try this. Brilliant detail and photos!
And will buy a torque wrench.
On another note, we need another bike and was thinking about the radrunner one
fixie. My goal is to create a foot flat experience and I’m wondering if you or anybody else knows if the runner has a lower crank than the rad mini step through.
That would allow someone to sit lower and yet extend their legs a bit more.
One idea is to put the handlebars back and sit on the bench to pedal but I don’t think pedal leverage would be easy from the bench.
Thanks again!
 
Hi Driftway,
Check out these reviews from EBR. Standover height is about the same for both. The difference is that you can bring down the seat and with the added accessory seat can make a bench seat. I remember he did mention the driver could sit back and still reach the pedals, but forget the details. Scroll down and watch the reviews. Scroll down more and the specs for the bikes are all listed. There is probably another review for the newer RADRunner so just do a search for it.
Personally I think the Mini is a better deal and in fact the newer ones have better tires and come with fenders. Buyers are getting a better deal now at the same price as when I bought mine because that was all an extra expense. Don't forget that you also get some discounts for previous purchases and when buying two.
Good luck...


RADRunner Review


RADMini ST Review
 
Why Won't My Over-Priced New Bike Rack Fit On My Bike?

There are a few reasons, the main reason being a result of non-existent or slack quality control inspection in the shop contracted to build the racks. The drilled and threaded connection points are also a responsibility of the distributor to provide a perfectly operable accessory, and I needed to do some thread chasing on a couple of them. Not everyone has the necessary tools for doing that.

Other reasons include carelessness when transporting the goods from one point to another, whether by forklift, or delivery drivers who sometimes use packages as a ladder to reach up for packages sitting on a higher shelf, or even dumping them or running them over. There are all sorts of reasons.

But the main reason can be found in the construction process. The welder is usually doing piece work. Now that sounds nice but actually means he is getting paid for each individual rack he builds, as in contrast to receiving an hourly wage. He assembles the rack by welding each part that fits perfectly onto a fixture or as more commonly called, a jig. This creates each and every rack of the same model to exactly the same specs. When he makes his last weld, the rack will fit perfectly onto the bike it was made for. However, things don't always work out so well to perfection because of several reasons. The first reason is that often the welder is limited in how many racks he can make because the taxes charged on his pay will begin to raise faster than the profit from building the rack. Piece work welders often set a daily quota for themselves. Since Jose wants to hurry up and get his quota done, he begins to take a few shortcuts to get each rack finished as quickly as possible. This is when bike racks begin to show a shoddy fit, so stay with me on this. Even though the rack is a perfect fit while still sitting in the jig, removing it too soon before the welds have cooled properly will often cause some tweaking to take place. Old Jose wants to go home early to his beloved Rosarita and a plate full of enchiladas, and so while innocently shortcutting the cooling time it is also causing the racks to bend a little bit out of shape. Placed back into proper shape however, the rack will still fit, and that's exactly why you don't want to make any modifications in its construction as received just so it will fit.

Most are not badly bent out of position, so I just use a prybar (my heavy duty screwdriver) and force it into position enough to insert the bolt. The choice is yours - take five minutes using some applied force or wait while the distributor haggles over whether to replace it.

There is another fix for those adventurous souls who might own a torch or a commercial grade heating gun by simply heating the areas of a rack that will allow it to take proper positioning again with a little forceful leveraging. Unfortunately, you may destroy the paint on the rack. Buying parts painted in flat black can be easily touched up whenever necessary. But white and orange can be painted over too. Good luck with it!
 
Back